FoodVillage orders can be set to automatically print to various printers. In this guide, you will learn how easy it is to setup a wireless printer for an Android System such as the Sunmi POS hardware.
PushPrinter Installation
Downloading the software
Turn on the hardware and make sure you have a data connection.
Open the Play Store application
Search for “PushPrinter” and download it
Setting up the software
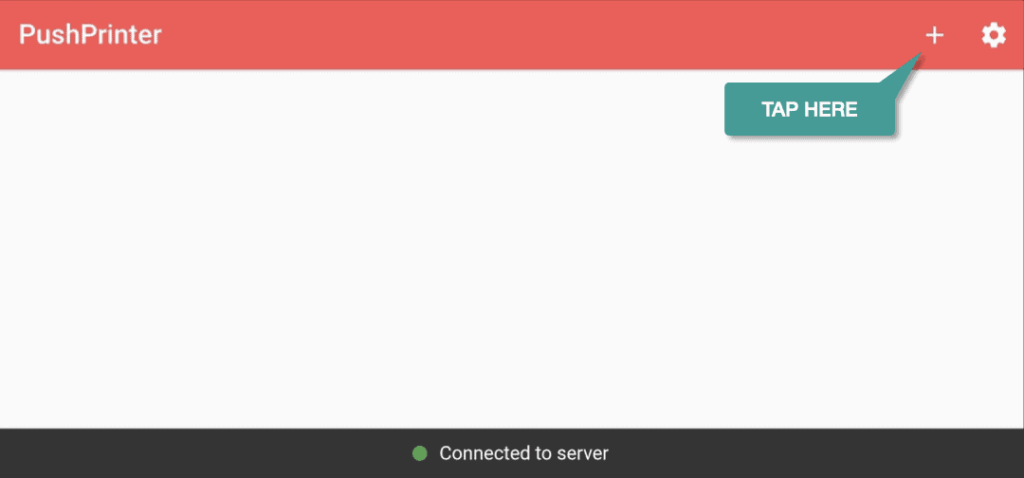
1. Once the app is downloaded turn on the PushPrinter app.
2. Click on the “+” in the top right hand corner to add a new printer.
3. Under Printer Connection Type, select “Bluetooth”
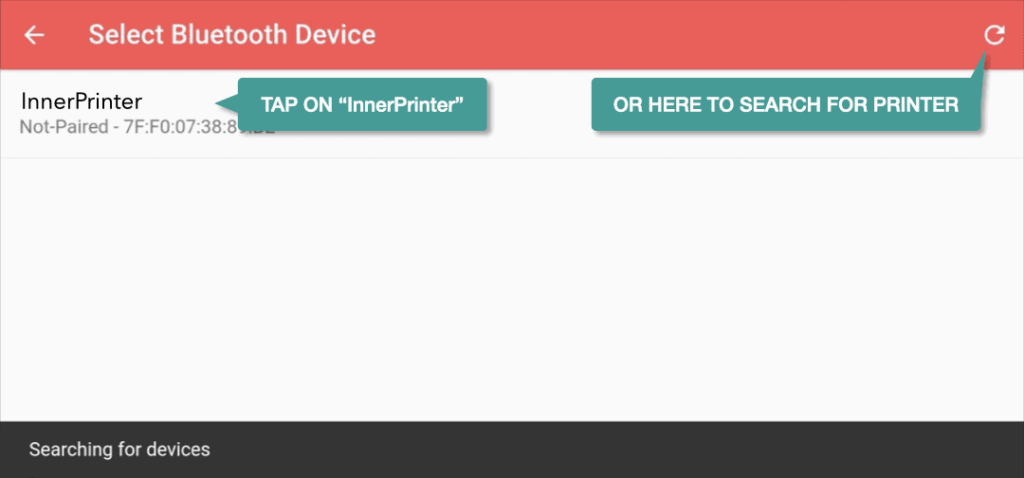
4. Under Select Bluetooth Device select “InnerPrinter” (A test printout will occur)
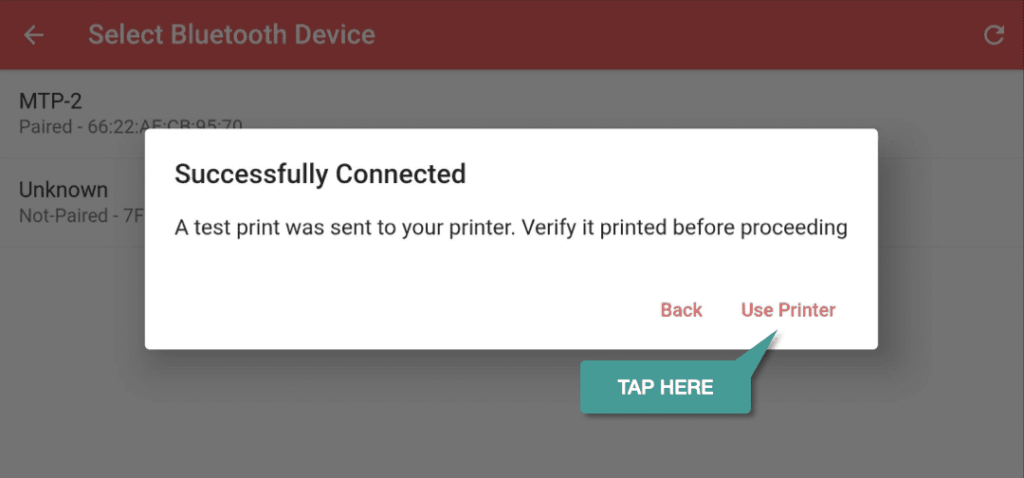
5. You will see a pop-up that says Successfully Connected. Click on “Use Printer”
Adding the printer
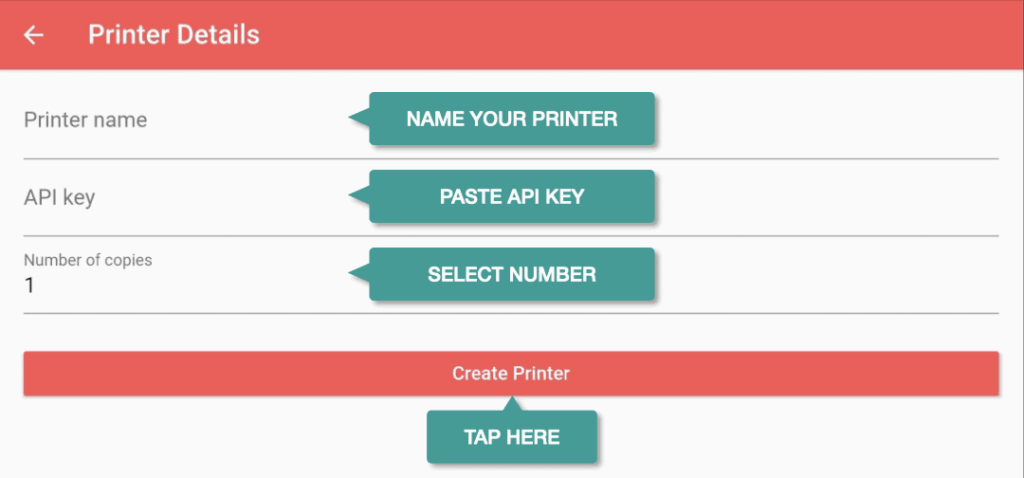
After the above steps:
Name the printer
In the API field enter the printer API
Set the number of copies you’d like to print each time
Confirm the above setting by clicking on “Create Printer”. You will then see the status “Connected To Server” at the bottom of the window.